유튜브에서 회전하는 도넛 영상을 보고, 회전하는 구를 그려 보았다.
1. 난해하게 만든 전체 소스는 아래와 같다.
<!DOCTYPE html>
<html lang="en">
<head>
    <meta charset="UTF-8">
    <title>Sphere</title>
    <meta name='viewport' content='width=device-width, initial-scale=1.0'>
    <style>
        canvas {
            height: 100%;
            width: 100%;
        }
    </style>
</head>
<body>
<div align='center'>
    <canvas id="canvas"></canvas>
</div>
<script language="JavaScript">
    // Start: 2022.01.18
    // Update: 2022.01.19

    let cvs;
    let canvas;
    let bufCanvas;
    let bufCtx;
    let thetaX = 0;
    let thetaZ = 0;

    let SIN = [];
    let COS = [];

    function InitValue() {
        for (let i = 0; i < 628; i++) {
            SIN[i] = Math.sin(i / 100);
            COS[i] = Math.cos(i / 100);
        }
    }

    function InitCanvas() {
        height = window.innerHeight;
        width = window.innerWidth;

        console.log(">Width:", width);
        console.log(">Heigth:", height);

        canvas = document.getElementById("canvas");
        canvas.width = width;
        canvas.height = height;
        cvs = canvas.getContext("2d");

        bufCanvas = document.createElement("canvas");
        bufCanvas.width = canvas.width;
        bufCanvas.height = canvas.height;
        bufCtx = bufCanvas.getContext("2d");
    }

    function drawCircle(x, y, c, r) {
        bufCtx.beginPath();
        bufCtx.fillStyle = "rgb(" + c + "," + c + "," + c + ")";
        bufCtx.strokeStyle = "rgb(255, 255, 255)";
        bufCtx.arc(x, y, r, 0, Math.PI * 2);
        bufCtx.stroke();
        bufCtx.fill();
        bufCtx.closePath();
    }

    function _draw() {
        let maxSize = canvas.height < canvas.width ? canvas.height : canvas.width;
        let dimen = 8;
        let ox = canvas.width / 2;
        let oy = canvas.height / 2;
        let R1 = maxSize/20;
        let ZZ1 = maxSize * 1000 * 0.4 / R1;

        let points = [];

        for (let i = 0; i < 628; i += dimen) {
            let a = COS[i];
            let b = SIN[i];

            for (let j = 0; j < 628; j += dimen) {
                let c = COS[j];
                let d = SIN[j];
                let e = COS[thetaX];
                let f = SIN[thetaX];
                let g = COS[thetaZ];
                let h = SIN[thetaZ];

                let k = b * R1 * e - a * R1 * d * f;
                let x4 = a * R1 * c * g - k * h;
                let y4 = a * R1 * c * h + k * g;
                let z4 = ZZ1 / (1000 + b * R1 * f + a * R1 * d * e);
                let light = (b * f + a * d * e);

                if (light > 0) {
                    let color = Math.round(light * 255);
                    let xp = Math.floor(x4 * z4 + ox);
                    let yp = Math.floor(-y4 * z4 + oy);
                    points.push([xp, yp, 255-color]);
                }
            }
        }

        bufCtx.strokeStyle = "black";
        bufCtx.fillStyle = "black";
        bufCtx.fillRect(0, 0, canvas.width, canvas.height);
        points.forEach(e => drawCircle(e[0], e[1], e[2], 1));

        thetaX = (thetaX + 2) % 629;
        thetaZ = (thetaZ + 2) % 629;
    }

    function OnDraw() {
        let startTime = new Date();
        _draw();

        cvs.clearRect(0, 0, canvas.width, canvas.height);
        cvs.drawImage(bufCanvas, 0, 0);

        console.log("Elapsed time: " + (new Date() - startTime));
    }


    function onLoadPage() {
        InitValue();
        InitCanvas();
        OnDraw();
        setInterval(OnDraw, 50);
    }

    window.onload = onLoadPage();
</script>
</body>
</html>
1. HTML로 구를 그리기 위한 기본적인 뼈대를 작성한다.
아래 코드에서 _drawSphere()를 채워 나갑니다.
하기 HTML 코드는 좋은 예제가 아닙니다. HTML 관련은 인터넷에 있는 좋은 코드를 참고 하시기 바랍니다.
<!DOCTYPE html>
<html lang="en">
<head>
    <meta charset="UTF-8">
    <title>Sphere</title>
    <meta name='viewport' content='width=device-width, initial-scale=1.0'>
    <style>
        canvas {
            height: 100%;
            width: 100%;
        }
    </style>
</head>
<body>
<div align='center'>
    <canvas id="canvas"></canvas>
</div>
<script language="JavaScript">
    let cvs;
    let canvas;
    let bufCanvas;
    let bufCtx;

    function InitCanvas() {
        height = window.innerHeight;
        width = window.innerWidth;

        console.log(">Width:", width);
        console.log(">Heigth:", height);

        canvas = document.getElementById("canvas");
        canvas.width = width;
        canvas.height = height;
        cvs = canvas.getContext("2d");

        bufCanvas = document.createElement("canvas");
        bufCanvas.width = canvas.width;
        bufCanvas.height = canvas.height;
        bufCtx = bufCanvas.getContext("2d");
    }

    function _drawSphere() {

    }

    function OnDraw() {
        let startTime = new Date();

        bufCtx.strokeStyle = "black";
        bufCtx.fillStyle = "black";
        bufCtx.fillRect(0, 0, canvas.width, canvas.height);

        _drawSphere();

        cvs.clearRect(0, 0, canvas.width, canvas.height);
        cvs.drawImage(bufCanvas, 0, 0);
        console.log("Elapsed time: " + (new Date() - startTime));
    }


    function onLoadPage() {
        InitCanvas();
        OnDraw();
        setInterval(OnDraw, 50);
    }

    window.onload = onLoadPage();
</script>
</body>
</html>
2. 원 그리기
원점을 기준으로 지름 r인 원은 아래 수식으로 표현 할 수 있습니다.
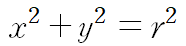
이때, x, y는 아래와 같이 구 할 수 있습니다.

원래 작성한 코드는 아래와 같다.
<!DOCTYPE html>
<html lang="en">
<head>
    <meta charset="UTF-8">
    <title>Sphere</title>
    <meta name='viewport' content='width=device-width, initial-scale=1.0'>
    <style>
        canvas {
            height: 100%;
            width: 100%;
        }
    </style>
</head>
<body>
<div align='center'>
    <canvas id="canvas"></canvas>
</div>
<script language="JavaScript">
    // Start: 2022.01.16
    // Update: 2022.01.18

    let cvs;
    let canvas;
    let bufCanvas;
    let bufCtx;
    let thetaX = 0;
    let thetaZ = 0;

    function InitCanvas() {
        height = window.innerHeight;
        width = window.innerWidth;

        console.log(">Width:", width);
        console.log(">Heigth:", height);

        canvas = document.getElementById("canvas");
        canvas.width = width;
        canvas.height = height;
        cvs = canvas.getContext("2d");

        bufCanvas = document.createElement("canvas");
        bufCanvas.width = canvas.width;
        bufCanvas.height = canvas.height;
        bufCtx = bufCanvas.getContext("2d");
    }

    function drawCircle(x, y, c, r) {

        bufCtx.beginPath();
        bufCtx.fillStyle = "rgb(" + c + "," + c + "," + c + ")";
        bufCtx.strokeStyle = "rgb(255, 255, 255)";
        bufCtx.arc(x, y, r, 0, Math.PI * 2);
        bufCtx.stroke();
        bufCtx.fill();
        bufCtx.closePath();
    }

    function _draw() {
        let maxSize = canvas.height < canvas.width ? canvas.height : canvas.width;
        let dimen = 8;
        let ox = canvas.width / 2;
        let oy = canvas.height / 2;
        let R1 = maxSize/20;  // 원의 반지름

        // 카메라와 스크린의 거리를 z'라 하고, 그 투영되는 상을 x',y'
        // z:x = z':x'
        // z:y = z':y'
        // x' = xz'/z, y' = yz'/z
        // z' = z1
        // x', y' = xz1/z, yz1/z
        // z의 최대거리 z2 = 1000이라 하면
        // x' <= (height/2 * 0.8) (화면 중앙 위치, 마진 0.1)
        // x 의 최대 값은 R1 + R2
        // x' = Z1(R1+R2)/z2 = height * 0.4
        // Z1 = Z2 * height * 0.4 / (R1+R2)

        let ZZ2 = 1000;
        let ZZ1 = maxSize * ZZ2 * 0.4 / R1;

        let points = [];

        for (let i = 0; i < 628; i += dimen) {
            let x1 = Math.cos(i/100) * R1;
            let y1 = Math.sin(i/100) * R1;
            let nx1 = Math.cos(i/100);
            let ny1 = Math.sin(i/100);

            for (let j = 0; j < 628; j += dimen) {
                // Y축 회전
                let x2 = x1 * Math.cos(j/100);
                let y2 = y1;
                let z2 = x1 * Math.sin(j/100);

                let nx2 = nx1 * Math.cos(j/100);
                let ny2 = ny1;
                let nz2 = nx1 * Math.sin(j/100);

                // X축 회전
                let x3 = x2;
                let y3 = y2 * Math.cos(thetaX/100) - z2 * Math.sin(thetaX/100);
                let z3 = y2 * Math.sin(thetaX/100) + z2 * Math.cos(thetaX/100);

                let nx3 = nx2;
                let ny3 = ny2 * Math.cos(thetaX/100) - nz2 * Math.sin(thetaX/100);
                let nz3 = ny2 * Math.sin(thetaX/100) + nz2 * Math.cos(thetaX/100);

                // Z축 회전
                let x4 = x3 * Math.cos(thetaZ/100) - y3 * Math.sin(thetaZ/100);
                let y4 = x3 * Math.sin(thetaZ/100) + y3 * Math.cos(thetaZ/100);
                let z4 = ZZ2 + z3;

                let nx4 = nx3 * Math.cos(thetaZ/100) - ny3 * Math.sin(thetaZ/100);
                let ny4 = nx3 * Math.sin(thetaZ/100) + ny3 * Math.cos(thetaZ/100);
                let nz4 = nz3;

                // 법선 벡터 (nx4, ny4, nz)와 광원의 백터 내적 계산
                // 광원 위치는 (0, 0, -1)
                let lx = 0;
                let ly = 0;
                let lz = -1;
                let light = nx4 * lx + ny4 * ly + nz4 * lz;

                if (light > 0) {
                    let color = Math.round(light * 255);

                    // x' = xz'/z, y' = yz'/z
                    let xp = Math.floor(x4 * ZZ1 / z4);
                    let yp = Math.floor(-y4 * ZZ1 / z4);

                    points.push([xp + ox, yp + oy, 255-color]);
                }
            }
        }

        bufCtx.strokeStyle = "black";
        bufCtx.fillStyle = "black";
        bufCtx.fillRect(0, 0, canvas.width, canvas.height);
        points.forEach(e => drawCircle(e[0], e[1], e[2], 1));

        thetaX = (thetaX + 2) % 629;
        thetaZ = (thetaZ + 2) % 629;
    }

    function OnDraw() {
        _draw();

        cvs.clearRect(0, 0, canvas.width, canvas.height);
        cvs.drawImage(bufCanvas, 0, 0);
    }


    function onLoadPage() {
        InitCanvas();
        OnDraw();
        setInterval(OnDraw, 50);
    }

    window.onload = onLoadPage();
</script>
</body>
</html>'Coding > JavsScript 삽질기' 카테고리의 다른 글
| [JavaScript] 회전하는 도넛 그리기 (0) | 2022.01.19 |
|---|---|
| [Javascript] 좋은 글 링크 모음 (0) | 2021.10.16 |
| [Javascript] 3D programming 기초 링크 (일본어) (0) | 2021.02.13 |